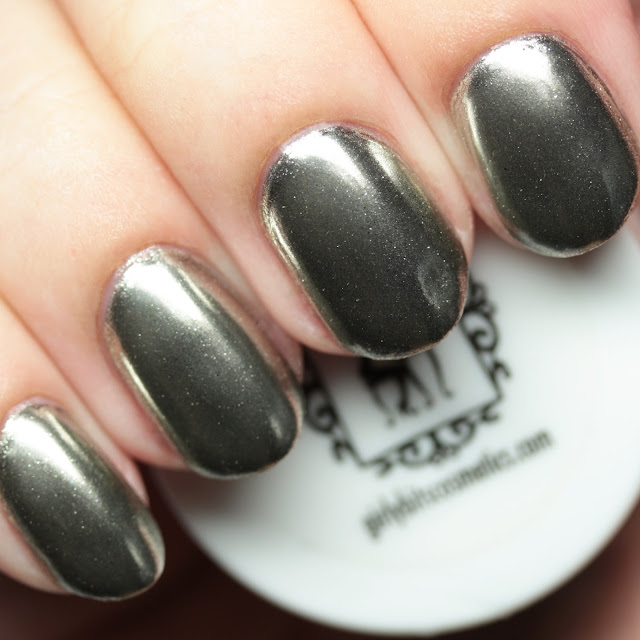
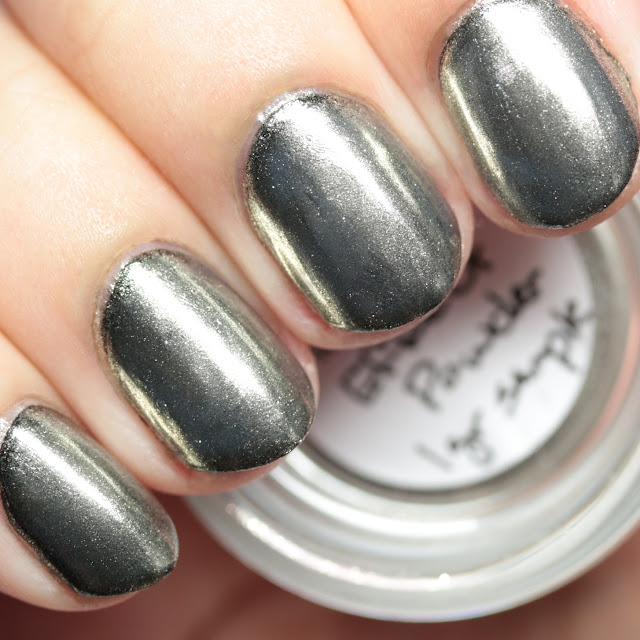
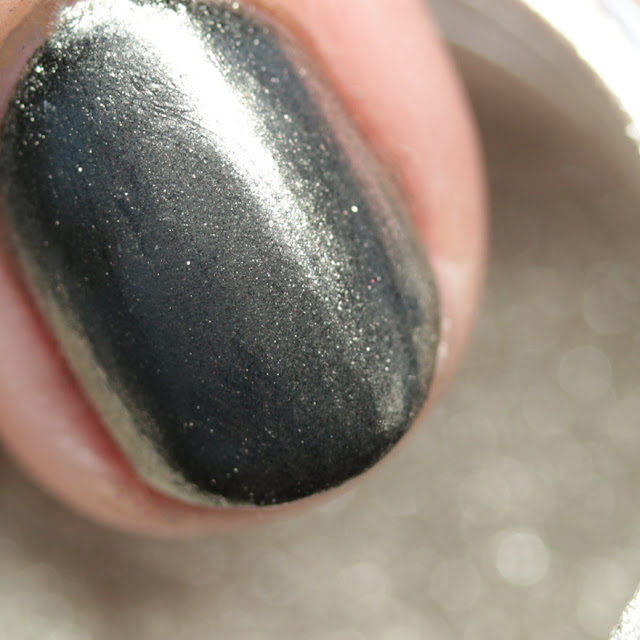
I'm continuing my series of reviews of Girly Bits Cosmetics nail powders with the Mirror Chrome Effect Powder! This will yield a silver, metallic effect and can be used with both gel and regular nail polish!
*powders sent for photography and review, all gel, nail polish, and top coats purchased by me*
I have some tips and tricks for using Girly Bits Mirror Chrome Effect Powder (or any chrome powder).
When first introduced, powders were used over gel polish, rubbed into a no-wipe top coat, which has a bit of a rubbery texture even when cured. This texture is ideal for getting the effect powder to cling to it smoothly. Used with regular nail polish, a traditional top coat would quickly dull the effect, leading many to believe they were suited only for use with gel. Trial and error on the part of numerous users has resulted in techniques to get the effect to work with regular nail polish as well, which increases the versatility of the technique, particularly for those who do not or cannot use gel polishes.
Tips with gel polish:
1. You will need to have not only a base color, but also a no wipe top coat in order to achieve the effect. I used Girly Bits Cosmetics Seal the Deal as well as a UV or LED lamp.
2. First apply your gel base and cure.
3. Two coats of colored gel polish are usually needed to achieve an opaque base. Note that different three-step gels (which require wiping) work differently with no-wipe top coats. Some are quite compatible and others are problematic and may result in dimpling of your top coat. By far the best colored gel I found for use with the Girly Bits Seal the Deal were from Dance Legend. CND Shellac (which contains a large percentage of regular nail polish) also worked well. China Glaze Gelaze resulted in a lot of dimpling. I strongly recommend wiping the colored gel after your final layer using a lint-free wipe and alcohol to remove the inhibition layer before applying and curing your no-wipe top coat. This seemed to minimize issues like dimpling and shrinking.
4. No wipe top coat is generally thicker than three-step gel and also more prone to bubbling. I recommend using the thinnest layers possible and keeping the brush as parallel to the nail as you can. Work slowly as vigorous manipulation will result in bubbles. Also, no-wipe gel will tend to settle if the coats are too thick, resulting in lumps, so take the time to get the right amount on your brush and wipe off any extra. Also, no-wipe gel heats up a lot in the curing process, so if your coats are too thick you will feel a lot of heat while in the lamp.
5. You can rub the powders into the no-wipe top coat using a variety of methods. I prefer to use sponge eyeshadow applicators, but others have used their fingers, brushes, silicone tools, or q-tips. I find burnishing the powder in for a while with minimal pressure will really bring out a chrome look.
6. You will need to seal in the powder with a second layer of no-wipe top coat. Be sure to wrap the tips all the time with gel to get maximum opacity and prevent shrinkage. Remember, the top coat keeps the chrome effect on the nail, so if you have shrinkage or tip wear, it will become obvious as the powder wears off.
7. Be sure to allow lots of extra time to soak off a multi-layer gel mani. With a gel base, two layers of colored gel, and two layers of no-wipe top coat (which is thick) you end up with five layers of gel total. I found 45 minutes of soaking allowed me to flake the old gel off with no effort. If you have less peel-prone nails and I do, you might get away with a shorter soaking time, but I recommend allowing 20 or more minutes with the foil method.
Tips with regular nail polish:
1. Apply your base coat and colored polish as usual.
2. Apply a layer of clear top coat to 2-3 nails and allow it to become solid but ever so slightly tacky - then dab the powder on with an eyeshadow applicator to each top-coated nail, applying no pressure. Gradually switch to circular burnishing motions, again applying no downward pressure. If your timing is right, you will not mar the surface of the top coat and will be able to get the powder to cling nicely to the tacky top coat. It may take some practice to understand the right dryness and technique to get the best effect, but it can be learned quickly.
3. You must seal in the chrome effect with a water-based clear polish in order to preserve the look - regular top coat will make it turn sparkly, not chrome. UNT Ready for Takeoff yields a wonderful, minimally cloudy look. Nfu Oh Aqua Base is a bit cloudier, but wears longer.
4. Seal the water-based layer with regular top coat, being sure to wrap the tips for wear. Note that the UNT will begin to de-laminate if you have tip wear, so this step is extra important. It has the strongest effect, but I would consider it something you can expect to last a day or two. Nfu Oh lasts like a normal mani, but is slightly duller.
Tips for both:
1. The strongest effect will always be over black or another dark color. Light colors may vary, but will tend to show the gray of the mirror powder. In general, these powders will lighten or gray down any color you use, but the base color will still contribute strongly to the overall look.
Here is the Mirror Chrome Effect Powder over a black gel:
Here is the effect over black nail polish, using UNT Ready for Takeoff as the water-based top coat. As you can see, the effect is slightly less dramatic and a bit cloudier, but still more chrome-like than using any standard nail polish.
Girly Bits Cosmetics Mirror Chrome Effect Powder is available now and is a wonderful, classic effect to add to your collection of nail supplies. Have you tried a chrome powder yet?
Girly Bits Cosmetics is a polish and nail care company run by Pam in Kingsville, Ontario. She was one of the very first indie nail polish companies and is now also a Canadian stockist for other lines.
Find her at:
Social media:
Facebook: https://www.facebook.com/GirlyBits/
Facebook group, Girly Bits Polish Lovers: https://www.facebook.com/groups/GirlyBitsLovers/
Facebook group, Girly Bits Swaps/Sales/ISOs: https://www.facebook.com/groups/1460327400901430/
Pinterest: https://www.pinterest.com/girlybitspolish/
Twitter: https://twitter.com/girlybitspolish


No comments:
Post a Comment